Quick Guides
The numbers
In this quick guide, find out how you can find and overlay coordinates, measure map features and add buffers to your maps.
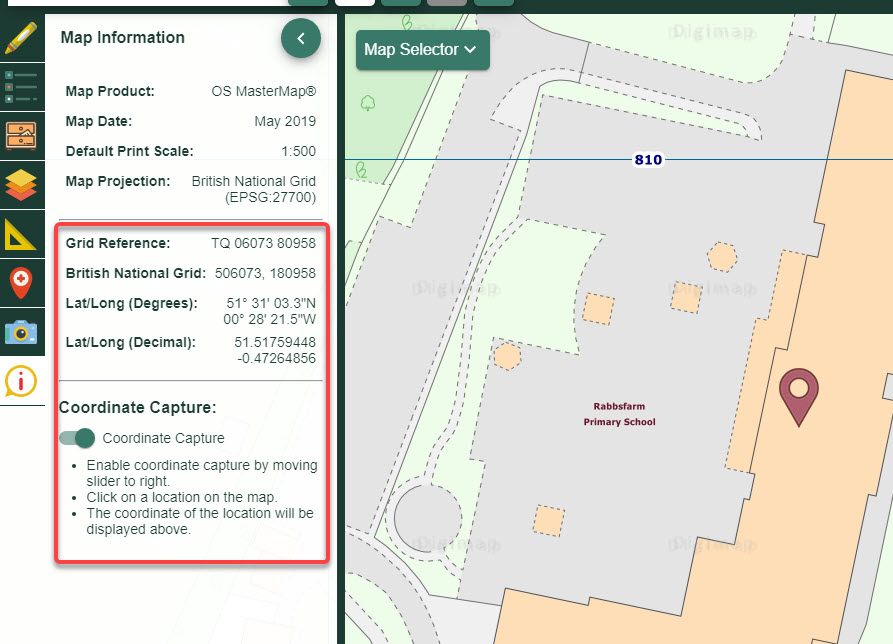
Capture coordinates
To capture the coordinates of any point:
- Open the Map information area in the sidebar.
- Select the coordinate capture button (it should now be green).
- Click on a point on the map.
- The coordinates of your point are displayed in the Map Information menu.
Overlay coordinate grids
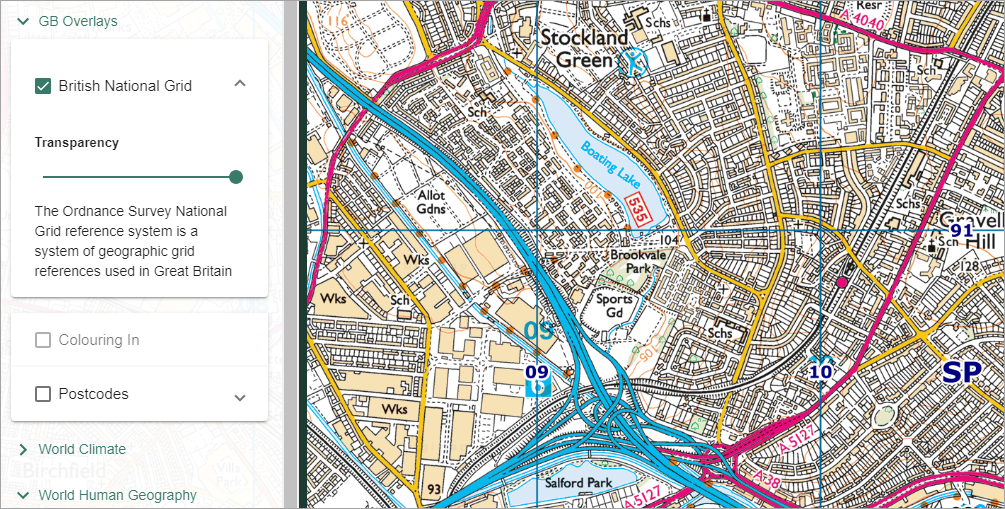
British National Grid
- Open the Overlays menu in the sidebar.
- Select GB overlays.
- Check the British National Grid box.
- Grid lines are displayed in the map window.
- Adjust the transparency of the grid lines by moving the transparency slider left and right.
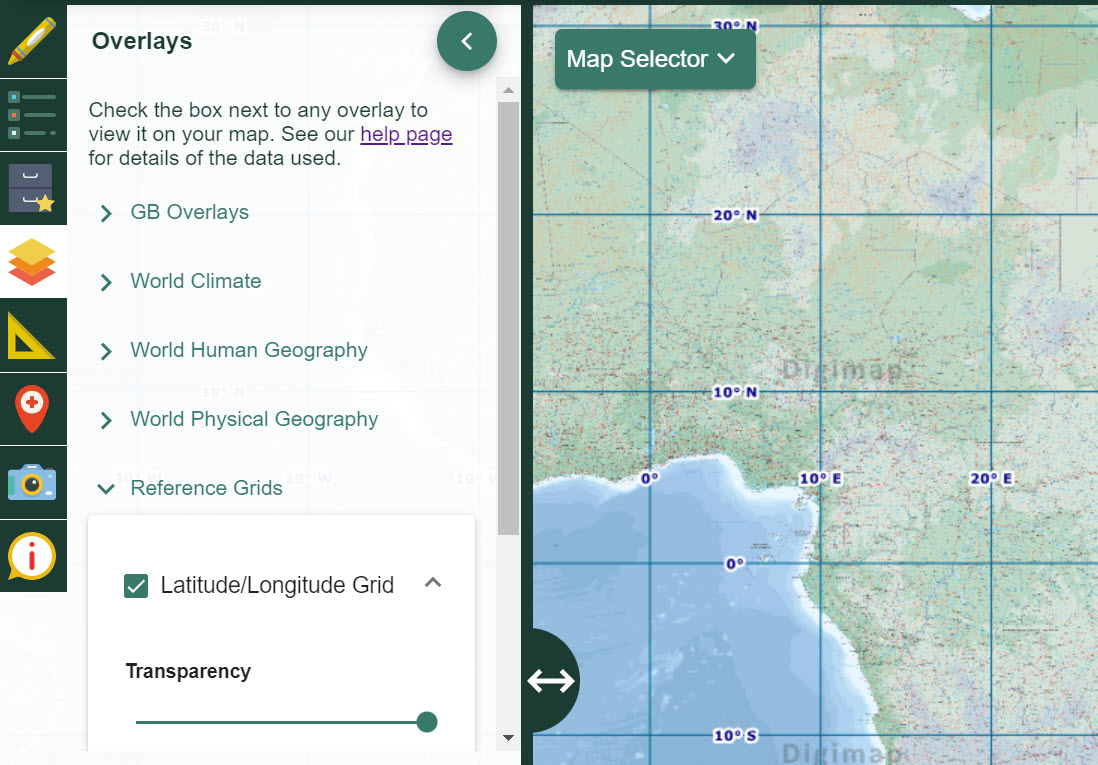
Latitude and Longitude
- Open the Overlays menu in the sidebar.
- Select Reference Grids.
- Check the Latitude/Longitude Grid box.
- The grid lines are displayed.
- Adjust the transparency of the lines by moving the transparency slider left and right.
Measure features
Measure distance or areas of map features with our measurement tools.
Measure video
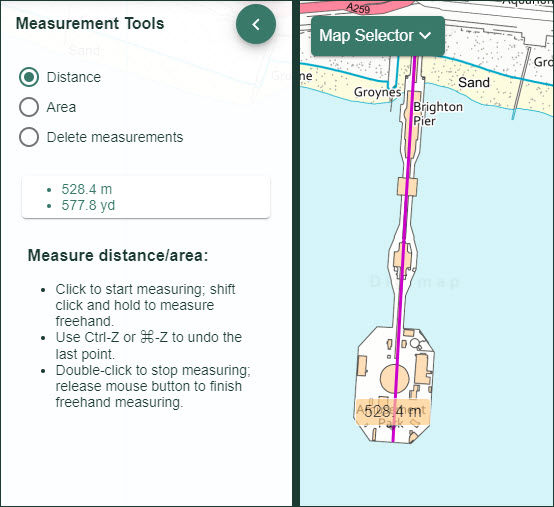
Measure distance
- Open the Measurement Tools menu in the sidebar.
- Select the measure distance button.
- Click or tap once on the map, at the point where you want to start measuring.
- Click or tap at the next point of your line.
- Continue adding points until you reach your last point.
- Double click or double tap to end your line.
- Your distance is displayed in the map window and in the measurement tools menu.
Measure area
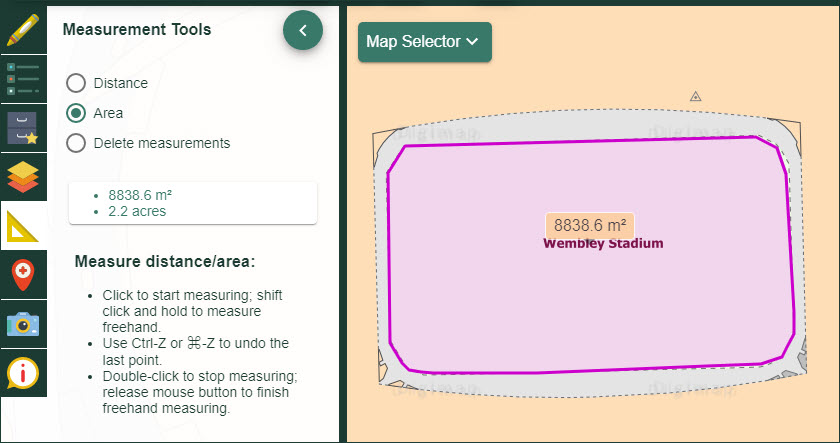
- Open the Measurement Tools menu in the sidebar.
- Select the measure area button.
- Click or tap once on the map to place the first point of the area you wish to measure.
- Now move round the area, clicking or tapping to create each point.
- Double click or tap at the last point.
- The total area will be displayed in the map window and in the Measurement Tools menu.
Add measurement labels
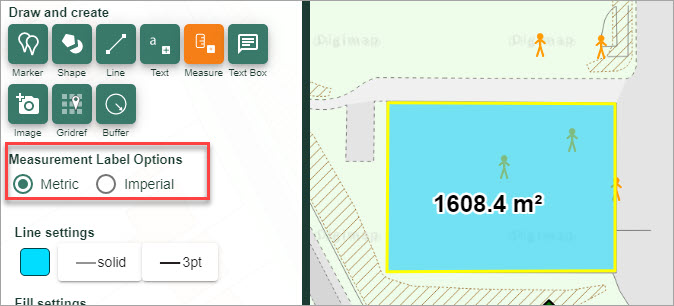
You can add measurement labels to the lines or shapes that you have added with the drawing tools.
- Open the Drawing Tools in the sidebar.
- Find the Draw and Create area.
- Select the Add measurement tool.
-
Now select the feature to add a label to…in the image below, we’ve added a label to a polygon that we added.
- Your label should be visible in the map window.
Add buffers
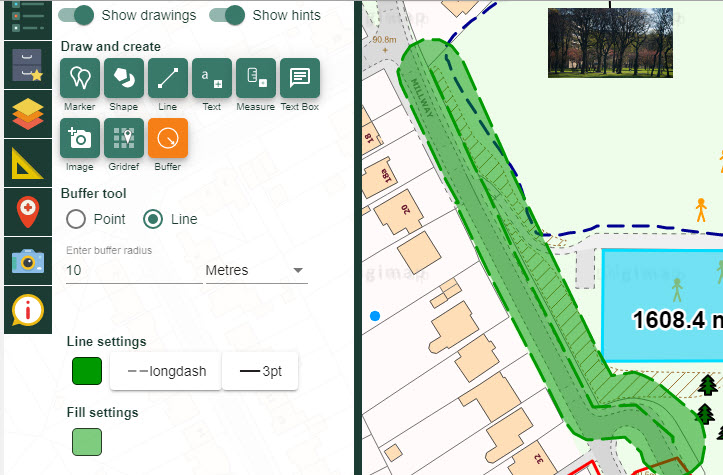
You can add a point or line buffer to your map, with the Drawing Tools.
Buffer video
Our short video shows how to add both point and line buffers.
Add point buffer
- Open the Drawing Tools in the sidebar.
- Find the Draw and create area.
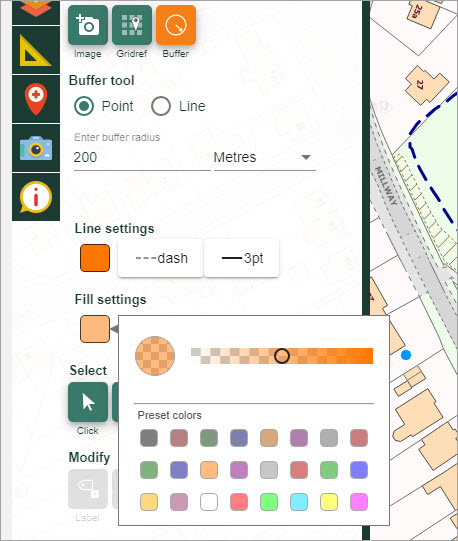
- Select the Buffer tool - it will turn orange.
- Select Point.
- Enter the radius you want - remember you can select metres, miles or kilometres by selecting the down arrow.
- Check the Stroke and Fill settings for colours, line style and width (found at the bottom of the Drawing Tools).
- Finally, select the point on your map where you want the centre of the buffer.
- Your buffer should be visible on your map.
Add line buffer
- Open the Drawing Tools in the sidebar.
- Find the Draw and create area.
- Select the Buffer tool - it will turn orange.
- Select Line.
- Enter the distance you want - remember you can select metres, miles or kilometres by selecting the down arrow.
- Check the Stroke settings for colour. line style and width (found at the bottom of the Drawing Tools).
- Click or tap to select the point on your map where you want to start your line.
- Keep clicking or tapping to add points to your line.
- Double click to finish the line.
- Your buffer should be visible on your map.
