Help
/
Add photos
How to guides
- Key areas of Digimap for Schools
- About the maps
- Navigating in Digimap for Schools
- Search
- Map selector
- View map keys
- Capture geographic coordinates
- Overlays
- View the compass
- Measure distance and areas
- Add text
- Add markers
- Add lines
- Add photos
- Add shapes
- Add buffers
- Add your own data
- Delete drawings
- Modify drawings
- Save maps
- Print maps
- Map information
- View Geograph images
- Edit your preferences
Add photos
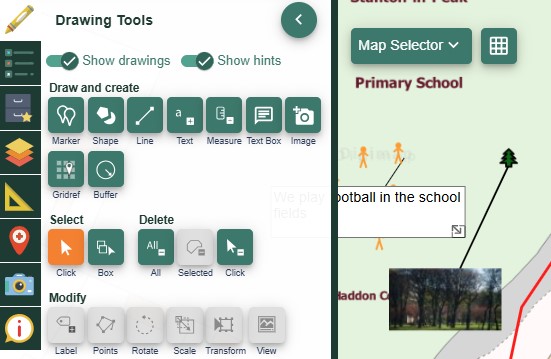
You can add your own photos to your maps with the Drawing tools.
Add photos
- Select the Image tool - the camera icon. The button will turn orange.
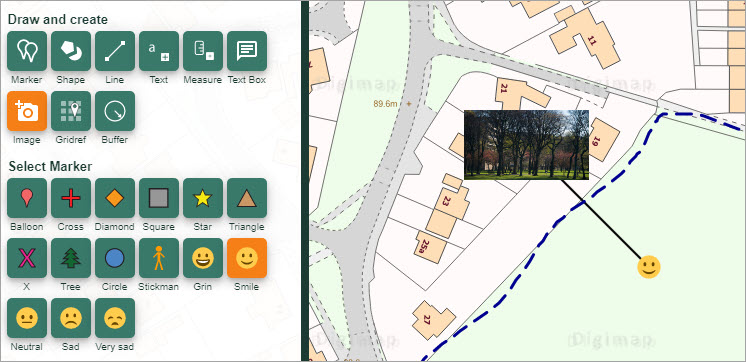
- Select a marker from the menu below (your photo will be added with a marker and a line - see image below).
- Now select the point on the map window where you want to place an image.
- Select Choose file and navigate to your image on your computer.
- Select the image and Open.
- Finally select Upload.
- Your image should be visible on the map window.
Move photos
- Make sure the Select arrow is active (highlighted in orange). When this is active you can move any drawing on your map window.
- Click and drag the marker OR the image to its new location.
- NOTE: you must move the marker and image separately.
Digimap for Schools and Cookies
We use cookies for security purposes, remembering your preferences and to analyse site traffic in order
to improve your experience using the service. This includes anonymised Google Analytics data.
We won't share your data with anyone else.
For more information please see our
Cookie Policy page.